Ensime with Emacs
I’ve been toying with the idea of looking for an alternative to Intellij for Scala development for a while now. I tried to use Ensime with Emacs a few months ago and never got it going for one reason or another. More recently, I’ve got Ensime and Emacs working together and thought I’d blog about it for anyone else who had trouble getting everything to work together.
Here are the minimum requrements as stated on the Ensime user manual:
1.Unix(y) or Windows OS 2.JVM Version 6 3.Scala 2.8.1 compatible source and libraries 4.Emacs 22 or later (23 is recommended)
Configuring Emacs for Scala
Ensure you have a working installation of scala 2.8.1final.
Install emacs. On Ubuntu you can do this with
sudo apt-get install emacsand on the Mac you can:
brew install emacsEnsure you have at least version 22 or later.
- Go to your scala_installation_dir/misc/scala-tool-support/emacs/ directory. Copy all .el, .elc files and the Makefile into a location where you want to store these files.
Eg. ~/scalaemacs
Copy the contrib/dot-ctags file to your ~/.ctags file
Using a command shell, change to the above directory and run make to convert the .el files to .elc files.
Add the following to your ~/.emacs file:
(add-to-list 'load-path "/path_to_your_elc_files")
(require 'scala-mode-auto)
eg:
(add-to-list 'load-path "~/scalaemacs")
(require 'scala-mode-auto)
You may need to create this file if it does not exist.
- Open a .scala file in emacs to verify syntax highlighting works and other basic scala functionality works.
Installing Ensime
Ensime can be downloaded from here. Download the latest version. The current version is -> ensime_2.8.1-0.5.0.tar.gz
Extract the archive downloaded to a know location. This will be your ENSIME_ROOT.
Eg. ~/opt/ensime
Verify that the ENSIME_ROOT/bin/server.sh file has execute permissions.
Add the following to your ~/.emacs file substituting ENSIME_ROOT for where you extracted the archive:
;; Load the ensime lisp code...
(add-to-list 'load-path "ENSIME_ROOT/elisp/")
(require 'ensime)

;; This step causes the ensime-mode to be started whenever
;; scala-mode is started for a buffer. You may have to customize this step
;; if you're not using the standard scala mode.
(add-hook 'scala-mode-hook 'ensime-scala-mode-hook)

;; MINI HOWTO:
;; Open .scala file. M-x ensime (once per project)
Your complete .emacs files should look something like:
(add-to-list 'load-path "~/scalaemacs")
(require 'scala-mode-auto)

;; Load the ensime lisp code...
(add-to-list 'load-path "~/opt/ensime/elisp/")
(require 'ensime)

;; This step causes the ensime-mode to be started whenever
;; scala-mode is started for a buffer. You may have to customize this step
;; if you're not using the standard scala mode.
(add-hook 'scala-mode-hook 'ensime-scala-mode-hook)

;; MINI HOWTO:
;; Open .scala file. M-x ensime (once per project)
Creating a Project with SBT
You need to create an Ensime project for each project you want to use with Ensime. The project details are written to a .ensime file in your project root. Ensime currently has support for SBT, Maven and Ivy. If you don’t have a build system you can also generate a .ensime file through the wizard or by hand.
The following is how to create a project for an existing SBT project:
- Launch emacs
- Type M-x to open the mini-buffer and then type: ensime-generate-ensime-config-gen. A note on the Meta key (or M-) combinations: On linux M-x is Alt+x, while on the Mac it’s Esc+x. Play around until you find which meta key is used on your flavour of OS.
- Specify the root of your project.
- If your project is an SBT project, it automatically detects most settings and you should see a message like: “Your project seems to be of type ‘sbt’, continue with this assumption? (yes or no)”. Choose yes.
- Enter all the other information requested.
- At the end you will see something like “Your project config has been written to /xyz/.ensime. Use ‘M-x ensime’ to launch ENSIME.” Your ensime file has been written and you are ready to use ensime.
- Type M-x and in the mini-buffer type: ensime to launch the Ensime server for your project. Reconfirm the location of your project.
- That’s it! :)
Neat Features
- Type inspection - will dive into details of the type at the cursor
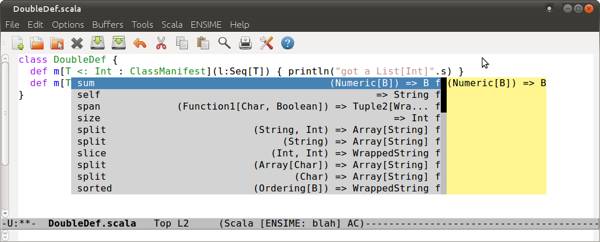
- Automatic member completion (eg. typing “blah”. followed by the Tab key will give you a list of the methods on String.
- Navigation between sources
- Refactoring (Renaming, Optimizing imports etc)
- Source formatting
- SBT support
- Dropping files into the Scala REPL
- Debugging (I haven’t had much luck getting this to work)
For a full list have a look at the online Ensime user manual.